Starting seeds is an exciting time. It is filled with anticipation for the start of the official gardening season and excitement over watching your seeds grow into hearty seedlings that will populate your garden. Unfortunately, a lot of newbie gardeners get sucked in by catchy advertising and pricey kits that really eat into your gardening budget. If you are looking for ways to be frugal, recycle household goods, and start seeds without breaking the bank, these budget-friendly, creative ideas will set you on your way.
K-cups
While there is some concern about the environmental and health impact of K-cups, if you still use these handy single-serve coffee containers, they can be repurposed into perfect seed starting containers. Simply line them up on an old cookie tray to make them easy to move, fill the cups with soil, and pop in your seeds. Remember, these cups are not biodegradable, so unlike other seed-starting containers, the plant will need to be removed from the cup before being planted outside.
Egg carton
Though an egg carton is slightly small to use as a starting container for many veggies, it makes the perfect choice for herbs such as basil and cilantro. Plus, it is thin so it can fit in a windowsill, which is a bonus if you don’t have a lot of extra table space near a window and don’t want to set up a grow light. If you do stick it in a windowsill, make sure that it isn’t drafty, as the cold, early spring air could kill your seedlings.
Simply cut the carton in half, fill the bottom of one side with your soil and seeds, line the other half with a thin layer of plastic, and then situate the sides inside of each other. So it should be an egg carton half with soil, plastic, and then the remaining egg carton half. This will help prevent leakage as the material breaks down.
Paper towel and toilet paper rolls
Cut down cardboard rolls to the desired size and line them up on a plastic tray. Since these containers won’t have a bottom, it is important to avoid lifting them up and moving them as much as you can. One of the greatest things about using cardboard to start seedlings is that you can simply plant the whole thing when it comes time to move your seedlings outdoors; no transplanting needed. It’s super easy to save cardboard tubes, and you won’t have to spend an extra penny!
Plants with smaller roots such as tomatoes work best in toilet paper tubes since they won’t break out of the bottom. I also love cardboard tubes because you can simply add some water to the tray and hydrate your seedlings from the bottom up, without having to worry about disturbing their delicate growth.
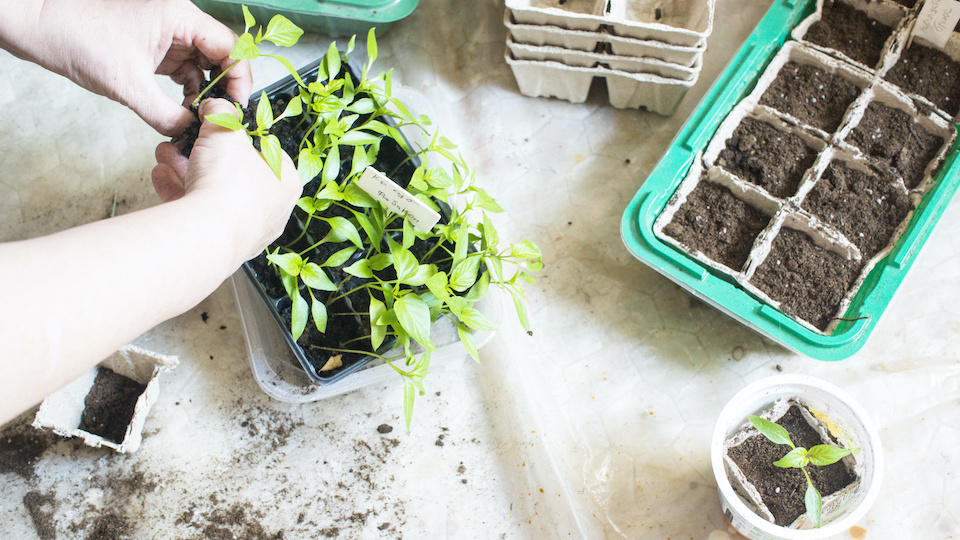
Use plastic nursery pots
Plastic pots are incredibly useful, so if you’re throwing away your containers after planting, you are making a huge mistake. When you buy plants from a nursery, they will usually come in plastic cups joined together or flimsy, individual pots. These make the perfect seed-starting containers!
Yogurt containers
Single-serve yogurt cups, sour cream containers, and other recycled plastic containers are excellent for seed starting. Rinse them out thoroughly and let them dry and you can fill them with soil and stick in your seeds. Bigger containers don’t need to be filled all the way, but it is a good idea to cut them down so that the light can still reach the seed. Another benefit of soft-plastic containers is that they are easy to squeeze and dislodge the soil without disturbing the roots, which makes transplanting a breeze.
Other tips for starting seeds:
- Be sure to use a high-quality seed-starter mix to give your young plants the best chance to survive.
- Choose a nice, sunny day to start your seeds so that you can prepare your soil and fill your containers outdoors.
- You don’t need expensive grow lights or heating mats. Simple low hanging shop lights will work just as well. You should keep about an inch of place between the highest leaves and the light. Raise the light as seedlings grow to maintain this distance.
- Use labels to identify what seeds you are growing or simply write it on the container with a permanent marker.
- Moisten the soil before planting. It should be wet but not dripping. You should also lightly mist your seeds after planting.
- Use a lid or plastic wrap over your containers until the seeds sprout. This will help encourage germination and trap in moisture.
- Though it may seem counterintuitive to remove a plant, thinning is essential for the health of your crop. If two seeds are growing in a single container, simply snip off the weaker looking one at the base of the soil.
Seed starting is a super fun, rewarding process, and it can save you tons of money, especially if you follow these money-saving tips to maximize every dollar you spend in the garden. Happy planting!
Do you know of any other creative ways to start seeds on a budget? Let us know in the comments below!
-Susan Patterson