If you only grow one thing in your home garden, it should be greens. There are several delicious and nutritious greens that are easy to grow and provide a valuable resource throughout the garden season and even beyond…More on that to come. Leafy greens are also known as salad greens, pot herbs, vegetable greens, or just greens. These plant leaves are eaten as a vegetable and contain important vitamins and nutrients. Likely, you don’t eat enough greens, and those that you do eat are not nearly as healthy as they could be.
Growing greens at home is one of the best things you can do for your health and the health of your family. If you are plugged into the news at all, you will be familiar with the fact that there seems to be an ever-increasing number of food recalls involving greens such as lettuce and spinach. It seems that the greens you find in your local grocery store are prone to becoming contaminated with dangerous bacteria. This alone is an excellent reason to take growing greens into your own hands.
The good news is, it is super easy to produce crops of greens all year long. The trick to successfully growing greens 365 days per year is knowing which greens to grow and how to grow great greens indoors.
Some great greens
Here are some delicious greens that anyone can grow at home and tips for being successful.
Lettuce
- Starting: Start seeds indoors ¼” deep, eight weeks before the last expected frost date.
- Planting: Transplant into garden when seedlings are four weeks old. 4 plants per sq. ft.
- Harvest: 28 days for baby lettuce, 45 for mature leaves. Can be harvested any time.
- Tips: Provide afternoon shade in warm weather to prevent wilting and stress on the plant. A stressed plant is much more susceptible to pests and disease. Plant more lettuce every two to four weeks to keep up a good supply.
- Growing all year: If you don’t have a greenhouse consider building a cold frame or moving your lettuce indoors where you can easily grow under lights.
Kale
- Starting: Start seeds indoors 1/2” deep, eight weeks before the last expected frost date.
- Planting: Transplant into garden six weeks before the last expected frost date. 1 per sq. ft.
- Harvest: 60 days to maturity.
- Tips: Kale is incredibly frost hardy and tastes even better when it is exposed to cold weather.
- Growing all year: Since kale is a cool-season crop it will do well in a sunny window where it gets about 6 hours of sunlight daily. Choose a dwarf variety and sow a small batch weekly. If you live in a relatively temperate climate, grow kale in cold frames during the winter months.
Spinach
- Planting: Plant seeds directly into the garden as soon as the soil can be worked. Plant a successive crop every two weeks in early spring. 9 per sq. ft.
- Harvest: Harvest outer leaves as soon as they are big enough to eat. Leave the inner leaves to allow the plant to keep producing. Spinach leaves can be easily frozen and enjoyed throughout the year or eaten fresh.
- Tips: When spinach is about to bolt (go to seed) in late spring, pull the entire plant out to enjoy the last harvest before the leaves become bitter.
- Growing all year: Spinach is easy to grow inside in a kitchen windowsill as long as it does not get too much direct sunlight. Use grow lights if plants don’t get enough light. If you have the right climate, grow spinach in a cold frame or growing tunnel. Be sure to provide plenty of ventilation.
Swiss chard
- Starting: Start seeds indoors 1/2” deep, six weeks before the last expected frost date.
- Planting: Transplant into the garden around the last frost. 9 plants per sq. ft.
- Harvest: 30 days from seed for baby greens, 50 days to full size.
- Tips: Swiss chard is a great summer green as it tolerates heat better than lettuce and kale.
- Growing all year: Swiss chard can be grown indoors in the pot during the cold season months. It is very forgiving and tolerates poor soil and even some neglect. Place the container in a location that receives full sun for most of the day. Pick the outer leaves first so that the plant can continue to produce.
The ultimate indoor green crop anyone can grow indoors
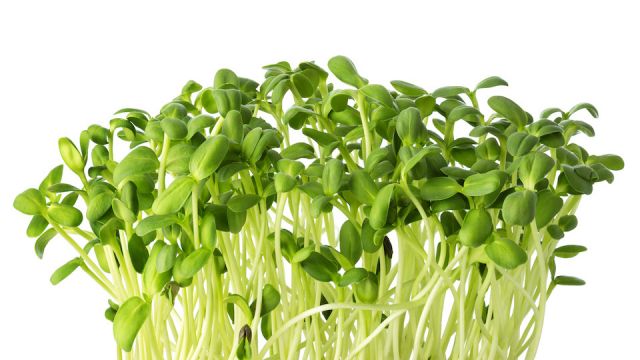
One of my favorite ways to supercharge my diet is by eating microgreens. Microgreens are nothing short of miraculous. They are so tiny and such perfect representations of fresh, adult size veggies, herbs, and greens. They have powerful and exciting flavors, and their nutritional value is way off the charts. Not only that, but they give any dish a beautiful color and texture.
I have discovered just how easy it is to cultivate, harvest, and use microgreens. In fact, it is so easy and so much fun that I love to share it with others. I grow greens on my kitchen counter, and anywhere I have a little extra space, which makes them super accessible and easy to care for all year round.
I love to toss a handful of tasty microgreens in my smoothies, soups, salads, or just eat them as a side dish with any meal. They are light, crisp, flavorful, and contain about 40% more health value than their adult counterparts. Wow, right?
With good light and adequate moisture, anyone can grow microgreens quickly from seeds. Although there are some variations when growing different types of microgreens such as best medium to grow in and blackout time, many things are similar, and if you are set up to grow one type, you can generally grow many varieties.
Although there are several ways to grow microgreens, it is best to use a shallow tray growing system.
Basic growing steps for soil-based growing
- Poke a few small holes in the bottom of your container.
- Cover the bottom of your container with an inch of moistened potting soil. Flatten it with your hand or a small piece of cardboard to remove any water pockets. Be careful not to over compress.
- Scatter the seeds evenly on top of the soil. Press them into the soil gently using your hand or a piece of cardboard.
- Cover your container for blackout purposes.
- Uncover and mist your seeds a couple of times a day.
- Remove the cover and expose your microgreens to bright light after they have sprouted.
- Water as needed.
- Taste your microgreens as they mature and harvest when ready.
Basic growing steps for hydroponic-based growing
- Pour one cup of water into your tray bottom (no holes).
- Place your hydroponic mat in the tray and allow it to soak up the water.
- Spread seed evenly over your mat. Keep in mind that the more seeds you spread on your mat, the denser your crop will be. Be careful not to let your seeds clump.
- Mist seeds thoroughly, cover, and place in an area at room temperature.
- Uncover and mist your seeds a couple of times daily.
- Once sprouts root, remove the cover and expose it to light.
- Water from the bottom as needed.
- Taste your microgreens as they mature and harvest when ready.
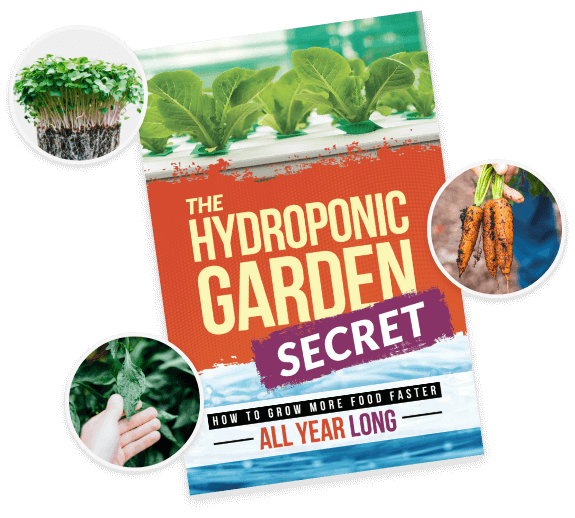
Growing microgreens has never been easier with the Instant MicroGrow Box. Get more information here!
-Susan Patterson