Growing and crafting fine teas is an involved and time-honored tradition that can take many years to master. That said, if you love gardening — and drinking tea — growing and processing your own organic, herbicide- and pesticide-free specialty teas will be an enjoyable and rewarding experience. In case you think you’re limited to tea leaves, think again. The ultimate tea garden can even include teas made from roots, seeds, and fruit. In fact, there are so many options, you could create an entire garden devoted to the art of tea drinking. Here’s what you’ll need to know!
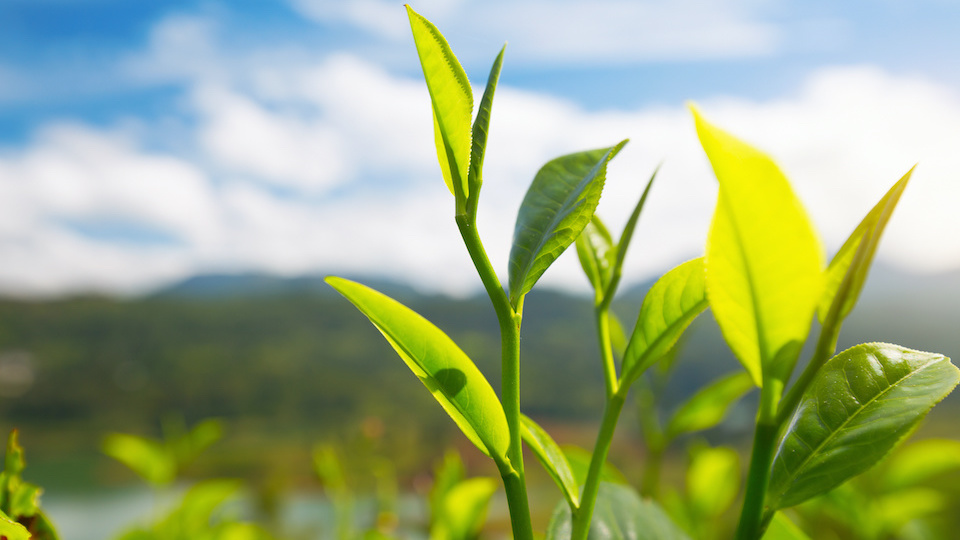
Tea plant (Camellia sinensis)
The tea plant is the plant from which all tea is made. From the tea plant comes the most popular green, oolong, and black teas. But this is where things get tricky. Each type of tea is produced from a different part of the plant and harvested at different stages of growth. This, combined with different processing methods, is how various types of teas are produced. The tea plant needs nitrogen, phosphorus, potassium, and lots of different trace minerals, just like other plants. Soil should be more on the acidic side of the pH spectrum so you may want to complete a soil test before planting.
Camellia sinensis is a very adaptable plant, but it does have growing limitations. This plant prefers hardiness zones seven through nine (sun to part-shade) and fertile environments with plenty of rainfall. If you are unfamiliar with your hardiness zone, check out the USDA Plant Hardiness Zone Map for your area. The tea plant can tolerate cold, but it can’t tolerate continual freezing temperatures. For instance, if you live in snowy climates with continual ice, or where the ground freezes hard, then growing the tea plant may not be an option. You will also need the right year-round growing conditions to sustain growth.
Harvesting and processing tea plant leaves
Once your tea plant is established, you’ll need to harvest and process your tea leaves. For black, green and oolong tea, pick the youngest leaves and leaf buds.
For black tea: Roll and crush leaves in your hands until they start to darken and turn red. Next, spread the leaves out on a baking sheet and store them in a cool area for two to three days. Finally, dry them in the oven at 250° F for about 20 minutes. Store tea leaves in an air-tight container.
For green tea: Allow leaves to dry in the shade for a few hours. Next, spread leaves on a baking sheet, and dry them in the oven at 250° F for 20 minutes. Store tea leaves in an air-tight container.
For oolong tea: Spread leaves out on a clean towel under the sun. Allow them to wither for about 45 minutes. Next, bring your leaves inside and let them sit at room temperature for a few hours — stir the leaves every hour until the leaves start to dry and turn red. Lastly, spread the leaves on a baking sheet and dry in the oven at 250° F for 20 minutes. Store tea leaves in an air-tight container.
Other tea leaves you may want to include in your garden
Clearly, you’re not limited to growing just Camellia sinensis in your tea garden. Other wonderful herbs can be grown, harvested, and dried to make specialty tea. Just be sure to check which plants thrive in your hardiness zone. Additionally, test your soil to make sure it has the nutrients necessary. Here are plants you may want to consider:
- Lemon verbena (Aloysia triphylla) USDA hardiness zones 9 —11
- Roman chamomile (Chamaemelum nobile) USDA hardiness zones 3 — 9
- German chamomile (Matricaria recutita) USDA hardiness zones 3 — 9
- Peppermint (Mentha x piperita) USDA hardiness zones 3a — 7b
- Spearmint (Mentha spicata) USDA hardiness zones 4a — 11
- Chocolate mint (Mentha x piperita Chocolate) USDA hardiness zones 3a — 11
- Sweet tea vine (Gynostemma pentaphyllum) USDA hardiness zones 8a — 11
- Raspberry (Rubus idaeus) USDA hardiness zones 3a — 8b
- Stevia (Stevia rebaudiana) — How cool would it be to grow your own sweetener in your tea garden? Stevia grows best in USDA hardiness zones 8a — 11.
You may even want to add a few roots into your garden for tea such as:
- Ginger (Zingiber officinale) USDA hardiness zones 8b — 11
- Licorice (Licorice Glycyrrhiza) USDA hardiness zones 7a — 9b
- Echinacea (Echinacea angustifolia) USDA hardiness zones 4a — 8b
- Dandelion USDA hardiness zones 3a — 10b
- Chicory (Cichorium intybus) USDA hardiness zones 4a — 11
Harvesting your tea
- For peak freshness, make sure to harvest your tea in the early morning after the dew has evaporated from the plants. Sunny days are best, suggests the University of Vermont Extension Department of Plant and Soil Science.
- Pick only healthy-looking leaves and use a sharp knife, making sure to leave enough foliage to keep the plants alive and Don’t cut back further than the second set of leaves and cut at a 45-degree angle, cutting close to a fork in the plant, if possible. This encourages the plant to bush out rather than shooting upwards.
Feel free to harvest your tea throughout the season. Keep in mind, perennial herbs need time to build up their reserves before winter, so they should not be cut any later than a month before the first fall frost. Additionally, get to know your plants. Some perennials left in the ground need to be mulched after the last harvest before winter for protection. Others, like lemon verbena, are not winter-hardy in northern climates and need to be replanted annually.
Drying your tea leaves
If you prefer, you can use fresh leaves for your tea. However, drying the leaves means you can enjoy them throughout the year. It’s quite easy to dry your leaves and there are a few different methods:
- Hang dry — Bunch cut herbs and tie them together with a string. Hang them upside down to dry. Just make sure to choose a warm, dark place with good ventilation. If air circulation is poor, your tea leaves may not dry properly and begin to mildew.
- Microwave — Place the herbs on a paper towel and microwave on low for 30 seconds. Dry in 30-second intervals, being careful not to burn your tea leaves. When herbs are almost dry, allow them to finish air-drying for 24 to 48 hours before storing.
- Conventional oven — Place leaves on a baking sheet. Dry the leaves at 250° F for several hours. Ensure the oven door remains open slightly. Stir occasionally. When leaves are completely dry, allow them to cool completely before placing in jars.
When the leaves are dry and crackly, they are ready to store. Simply strip the leaves from the stems and crumble in your hands or pulse them a few times in a food processor. Store tea leaves in an air-tight container.
Making a perfect cup of tea
Making a perfect cup of tea is an easy process and requires no more than boiling water, dried or fresh teas, a little honey or sweetener of your choice, and lemon, if desired.
- Use one teaspoon of dried tea leaves or one tablespoon of fresh tea leaves for each cup of water. Combine a few varieties of leaves to make the perfect blend.
- Add tea to a tea ball or directly into your teapot.
- Pour enough boiling water to cover the leaves and fill your cup.
- Allow the tea to steep for about 3 to 10 minutes. However, you may want to experiment with steeping times for a perfect cup. Keep in mind that certain teas like peppermint tea should not be over-steeped, which can produce a bitter taste.
- Strain and serve.
Most dried teas will maintain flavor for about a year. Enjoy!
-Katherine Marko