When I discovered just how easy it was to grow my favorite veggies, herbs, and even flowers in straw bales, I was hooked. Straw bale gardening combines the best of composting and compact gardening in one.
Straw bales make gardening easy and are a space-saving method that takes less time and effort than tending a conventional garden. Let’s dig into this “no-dig” gardening practice that has been around for a hundreds of year. The best part is that bales generally last for two growing seasons, which means less work for you.
Straw bales vs. hay bales
Before you begin your straw bale garden, it is important to source the correct type of bales. Straw bales are made from the stalks of cereal grain crops – the stuff that is left after the grain has been harvested. Hay bales are used to feed livestock and are grass crops such as fescue, alfalfa, or clover. Hay bales are heavier than straw and break down quickly because they are high in nitrogen. They are also more expensive than straw. Additionally, hay bales may contain seeds, meaning you will have grass sprouting up in your garden. Hay bales are also more likely to have been exposed to pesticides and chemicals. The best bales for your garden are organically grown straw bales.
Conditioning
Before you can plant, you have to prepare your bales. Place your bales with the cut side up – this will be the planting surface. Conditioning your bale starters with adding nitrogen which will create the perfect environment for healthy bacterial growth. Poke holes in the top of your bale and pour in some blood meal. Water well, and the beneficial bacteria will begin to explode. Do this every other day for two weeks before your last spring frost.
Planting
Once your bales are conditioned, there is no need to add any soil unless you are growing small seeds such as radishes, carrots, or lettuce. Add a thin layer of soil followed by a light layer to help cover seeds and allow them to stay in place and germinate. For larger seeds like beans, squash, and peas, simply insert them into the bale to about the depth of your second finger knuckle.
For transplants, create a hole that is deep and wide enough to accommodate the roots and plant directly into the bale. Cover any exposed surface roots with a little soil.
Drip irrigation
Using a drip irrigation system is a simple and effective way to keep your straw bale garden watered. It’s best if you set your system on a timer to provide just the right amount of water at the right time. This will save you both time and money!
Best plants for straw bale gardening
Here are my favorite plants to grow in a straw bale garden.
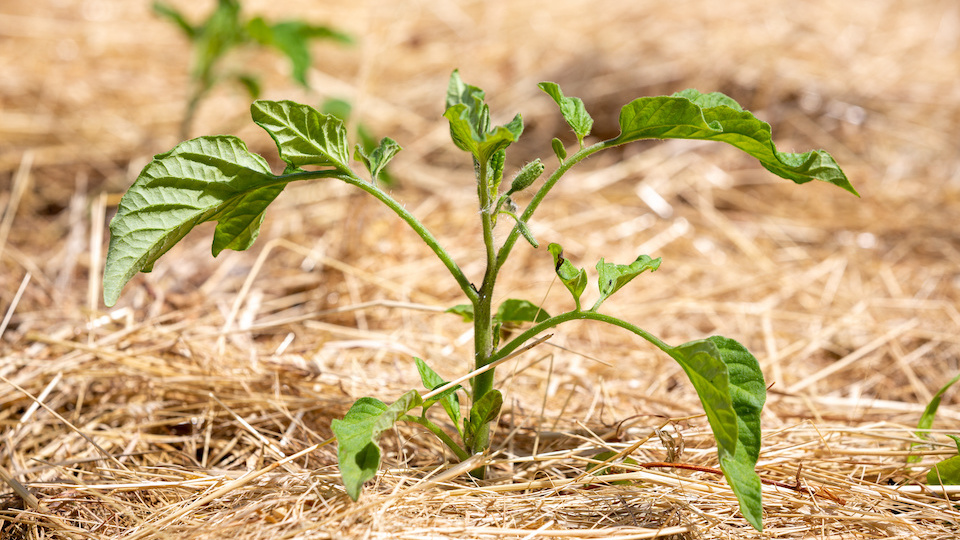
- Tomatoes – Small varieties work best.
- Potatoes – Potatoes love that the straw tucks around the plant to keep everything covered, and it is easier for the plant to push through straw than soil.
- Strawberries – Because strawberries love nitrogen, they grow really well in straw bales.
- Peppers – Peppers of all types love the environment of a straw bale and grow big, producing a lot of fruit.
- Lettuce – Plant lettuce seeds every two weeks for a continuous harvest.
- Spinach – Organic spinach can be pricey in the store, making it a perfect crop to grow in your straw bale garden.
- Kale – Like spinach, kale is easy to grow in a straw bale garden and does not take up much space.
- Garlic –Garlic is a small-scale crop that you can fit in empty spaces in your straw bale garden.
- Beans – Beans love nitrogen and will reward you in a straw bale garden. Grow bush varieties or provide a sturdy trellis for running beans.
- Peas – Like beans, peas are happy in a straw bale garden. Provide a sturdy trellis for best results.
- Herbs – Herbs like basil, cilantro, and parsley grow happily in a straw bale garden and are perfect to fit into small spaces in the sides of bales.
Tips for success
- Keep in mind the mature size of plants when planting. Give plants plenty of room to grow
- Tuck small plants such as herbs and flowers into the sides of the bale to utilize available growing space.
- Cover bales after the growing season (remove all plant material) with a piece of plastic so that you can use them again next season.
- Root crops and tomatoes prefer second-year bales that are more decomposed than a new bale.
- If you live in a cooler region, you may want to create a mini-greenhouse effect by covering your bales using plastic and wire trellises. The cover will help your bales heat up and give seeds and seedlings the perfect environment in which to get started.
- Straw bales gardens are simple to set up on rooftops, patios, and balconies.
- Provide an organic fertilizer tea for plants during the growing season for best results.
Happy growing!
-Susan Patterson, CBHC and Master Gardener