Microgreens are one food anyone can grow with minimum space, minimum effort, and a minimum investment of time and money. They are tasty and nutritious to boot. There really isn’t any excuse not to grow them.
Make your own indoor food factory
Microgreens are a blessing to those who don’t have outdoor space for gardening. They can be grown indoors, right there on the kitchen counter or near a sunny window anywhere in the house. And if you don’t have a conveniently located window, they’d be happy under a grow light.
The most significant advantage of growing microgreens indoors is that you can grow them all year, even in the dead of winter.
Microgreens, sprouts, and baby greens: what’s the difference?
Sprouts are precisely what the term implies: they are sprouted seeds. As they come out of their jackets, they unfurl an elongated part called hypocotyl that carries small fleshy structures called cotyledons. The latter are the food reserves of the seeds. Sprouts are harvested at this stage of their growth. They’re grown in the dark and without any medium, and they are eaten whole when ready.
Microgreens start out like sprouts but are allowed to grow in the open and in bright light until they develop a set of true leaves. Only the part above soil level is harvested. Baby greens get to grow a lot more; they’re just young seedlings harvested early for the table.
Best microgreens to grow
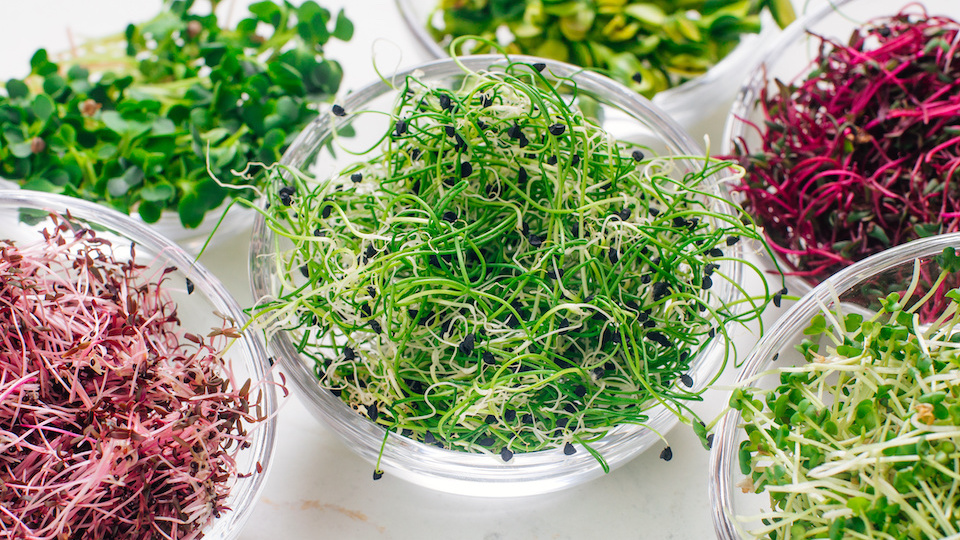
The best microgreens are the ones that you love most. Experiment with several types, and you will soon have favorites. Some grab your attention by their striking color, some by their crunch and crisp texture or delicate taste and flavor.
Seeds of any entirely edible plant may be used to make microgreens. Entirely edible means all parts of the plants should be edible. That brings green leafy vegetables that are commonly eaten either cooked or as salad greens and garnishes into the fold. If you like those greens, you’ll likely love their microgreens.
Apart from taste, there could be other reasons why some microgreens are universally popular. They might be easier to grow and more reliable than others. For instance, carrot seeds take a week or more to sprout and another 3 to 4 weeks to be ready for harvest. On the other hand, radish is one of the fastest growing microgreens, and almost all beginners start with it. Easy availability of seeds could be another factor.
From the nutritional point of view, red cabbage, red amaranth, and daikon radish are at the top of the list in vitamin content, but microgreens, in general, have been found to be at least five times or more nutritious than their mature plant parts.
Some popular microgreens:
Cabbage family: Cabbage, broccoli, Radish, Kale, Mustard, Cress, Arugula, Mizuna
Amaranth family: Red amaranth, Green amaranth, Spinach, Beet, Chard, Quinoa
Sunflower family: Sunflower, Lettuce, Chicory, Dandelion
Herbs: Basil, Celery, Fennel, Dill, Mint, Parsley, Chives, Cilantro
Gather all required equipment
Very few items are required for indoor cultivation of microgreens All you need are flat trays, a growing medium, watering can, spritz bottle, a block of wood for tamping down the soil, covers for the trays, and of course, the seeds. Grow lights, and heating pads may be added to the list to make up for any deficiency in light or warmth.
Choose the growing medium right for you
The growing medium is an important consideration not because of its quality but for its ease of handling and disposal after harvest.
Soil: Any type of potting soil is fine for growing microgreens because it merely serves as an anchor for the roots for only a short while. After use, it can be added to the compost pile or reused after cleaning.
One issue with soil is that it’s messy and the microgreens will have to be harvested carefully to avoid contamination. They may even have to be washed after harvest to remove grittiness, which can be a problem considering their delicate nature.
Soilless medium: Vermiculite and coconut fiber are two of the most commonly used soilless media and they have great water retention capacity. Though they are less messy than soil, careful harvesting is still required.
Grow mats: Burlap, coir, or hemp mats may be used to grow the microgreens hydroponically. They are non-messy, easy to handle, and a pleasure to harvest from. However, unlike soil, vermiculite, and coconut fiber, the mats are for single use. They are biodegradable, though.
Follow instructions carefully
Microgreen seeds usually come with specific instructions. Although experimenting with them may be fun, it pays to follow instructions for guaranteed success, especially when you’re starting out. Different seeds have different germination criteria with respect to light, temperature, and water requirements. Some need presoaking, some must have a layer of soil over them. These parameters have been experimentally determined. There really is no need to reinvent the wheel.
Play safe
When it comes to microgreens, it’s not advisable to be adventurous without proper knowledge. All seeds we eat as part of our normal diet may not be edible when sprouted. Typical examples are tomatoes and eggplants: although their seeds are normally eaten along with the vegetables, other plant parts are poisonous.
Microgreens first appeared as a specialty food in the 1980s. Their commercial cultivation only started a decade later, and it took another decade or so to become a popular item on our plates. Hence, it’s best to stick to tried and tested seeds and methods as you go about growing them.
-Susan Patterson, CBHC and Master Gardener